Continue reading "Advanced Feature for Churches that Rock!"
The post Advanced Feature for Churches that Rock! appeared first on PTZOptics.
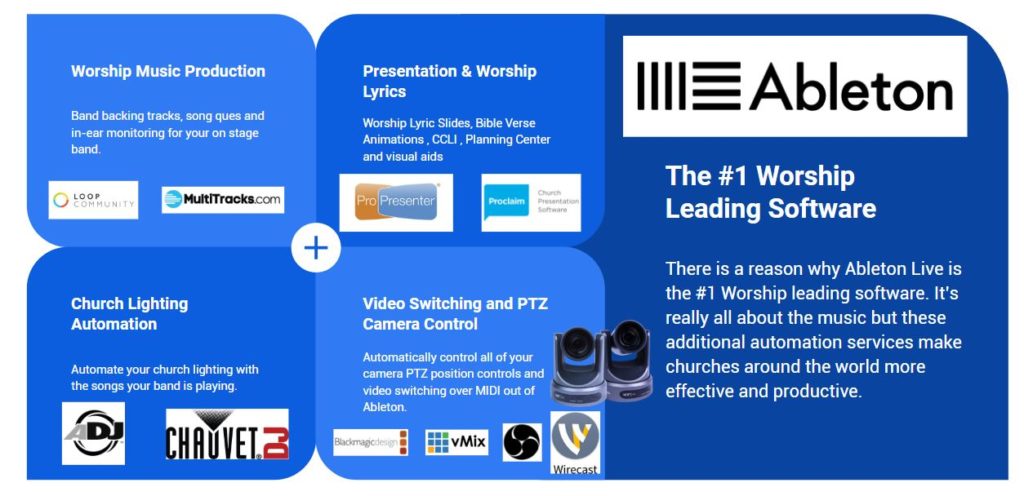
]]>This case study shares a behind the scenes look at the Keys Vineyard Community Church live streaming and video production setup. This setup uses Ableton to synchronize all of the church song and performances with Pro Presenter to manage the lower thirds musical lyrics overlaid on top of the live video. Using Ableton with a touch screen control software called TouchOSC, Doug Lawes the church media coordinator is able to automate the entire church video production system which includes: Ableton, Blackmagic Video Switcher, Chauvet DJ Lights, PTZOptics Cameras, Pro Presentor and OBS. We promise to release more details on this setup because many churches are interested in learning more.
There is so much that Doug Lawes, the church media coordinator, has done to make this house of worship audio-visual system shine. We are already planning a follow up webinar for Friday July 13th, 2018 at 2PM. Doug has agreed to answer questions for our live audience and explain how his system uses OBS, Blackmagic Design Video Switchers, Behringer Audio Mixers, Projectors, PTZOptics cameras and much more.
Ableton Church Video System Automation
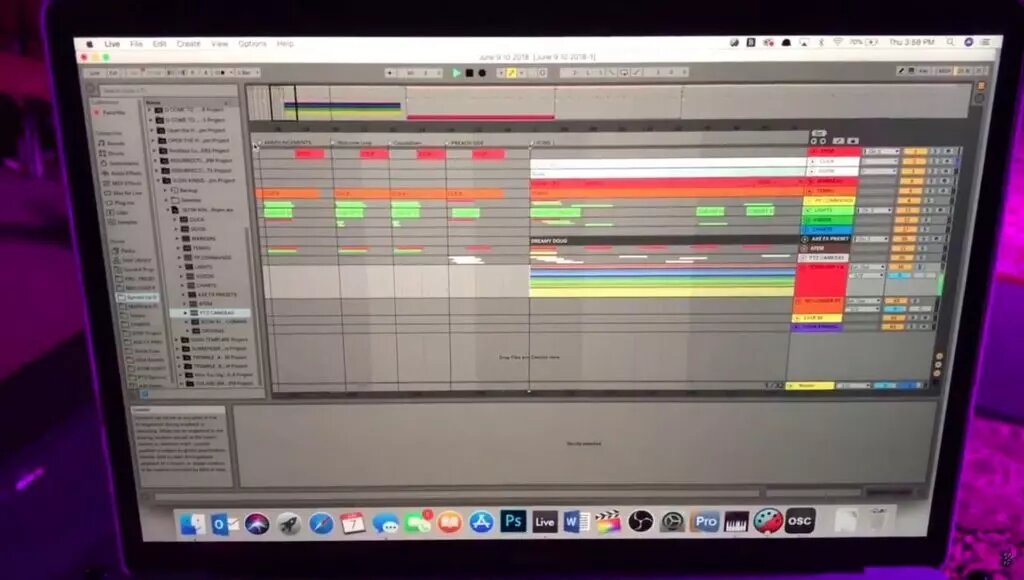
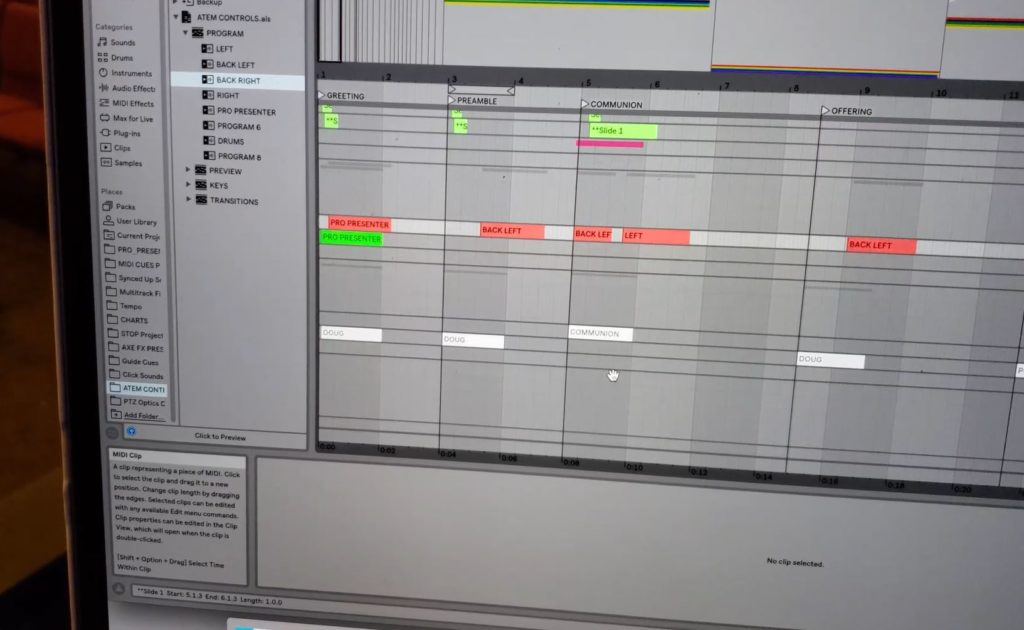
Let’s start by looking at the laptop running Ableton which is located on stage in the Keys Vineyard Church. As you can see, this Macbook Pro is connected to the LAN (Local Area Network). The networking in place allows the Macbook Pro running Ableton to connect to multiple control systems which can operate the lights, turn on a live stream, transition to OBS (Open Broadcaster Software) and much more. Furthermore, each song is set up in Ableton to work with ProPresenter which keeps the entire band in sync with the music but also displays the song lyrics over the live cameras that are being displayed on large projector screens inside the church.
In years past, Doug explains that keeping everything in sync with multiple software components was difficult to get the timing right on stage during the church service. Using Ableton Live provides churches with a single solution which we will explain in more detail throughout the blog post. Ableton Live has the ability to send MIDI notes to other programs. These programs can be running on the same Windows or Mac computer using Ableton or on another computer on the church LAN. Essentially you will need to use a MIDI loop or a MIDI network which can be different depending on whether you are using a Mac or a PC computer. These MIDI loops and MIDI networks are used to connect Ableton to other systems which could be running the lights, PTZ cameras, switching video on the Blackmagic Switcher or even starting a live stream on OBS.
Touch OSC Controller for Ableton
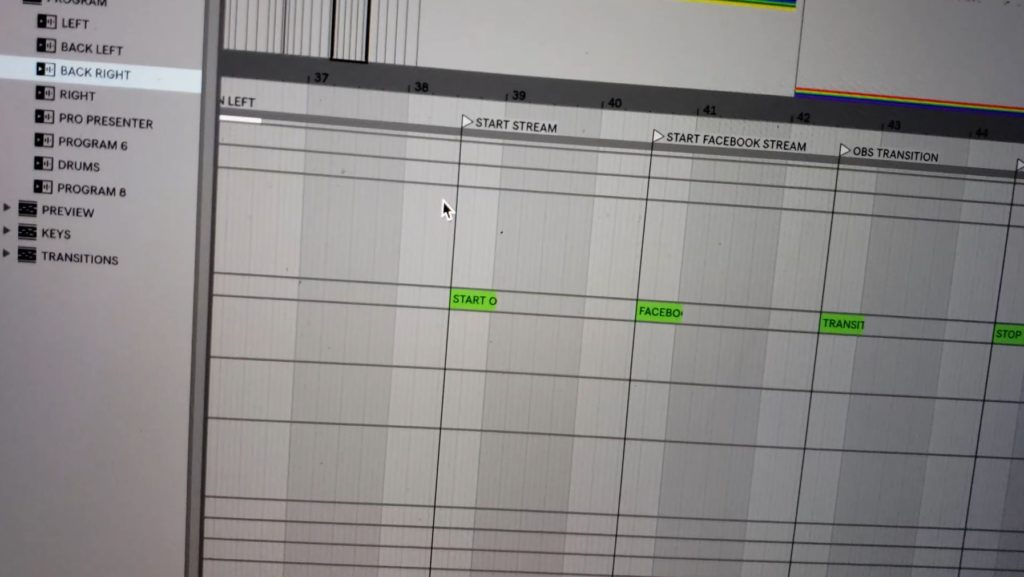
Start Live Streaming from Ableton

Ableton PTZ Camera Integration
Ableton Church System
Using TouchOSC and Blackmagic Video Switchers
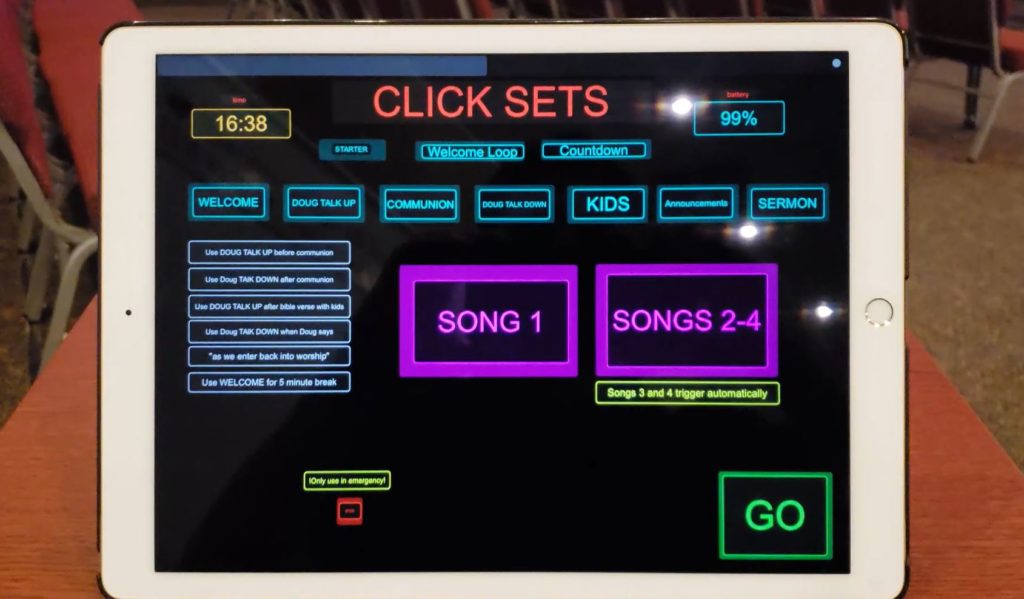
An important part of this church video production system is the TouchOSC control using an iPad. This iPad is connected to the LAN over WiFi and therefore has access to the entire network. The TouchOSC system can send commands to Ableton to start and stop songs during the church service. As you can see the TouchOSC iPad has a custom interface designed for the Keys Vineyard Church which can start and stop various songs easily. The iPad also allows the church to play a welcome video and operate the Blackmagic Video Switcher. Operating the Blackmagic Video switcher from TouchOSC is done through a software called atemOSC. AtemOSC is a software bridge that allows touchOSC to switch the video sources inside the Blackmagic switcher using MIDI which is ideal since everything is being handled through Ableton Live which can output MIDI easily.
The Blackmagic Production Studio 4k shown above is rack mounted inside the church video production booth. This video switch has five HD-SDI PTZOptics cameras connected which are also controllable via MIDI. Therefore throughout the Ableton live songs being played on stage, the church can decide where they want the cameras to zoom into and which time AND decide which camera they would like to be on the output of the Blackmagic Production Studio. The Blackmagic Production Studio video switcher is connected to a computer running OBS with a capture card. This capture card takes the output of the BMD video switcher and converts it to USB 3.0 for easy video ingestion into OBS.
MIDI Camera Control & Video Switching

PTZOptics has recently designed a PTZ camera MIDI control application which will take the MIDI output notes from any DAW (Digital Audio Workstation) like Ableton and convert that into VISCA over IP for camera control.
This software allows churches to control exactly where the camera will move during a song simply by dropping up to 10 camera PTZ preset positions inside the song timeline.
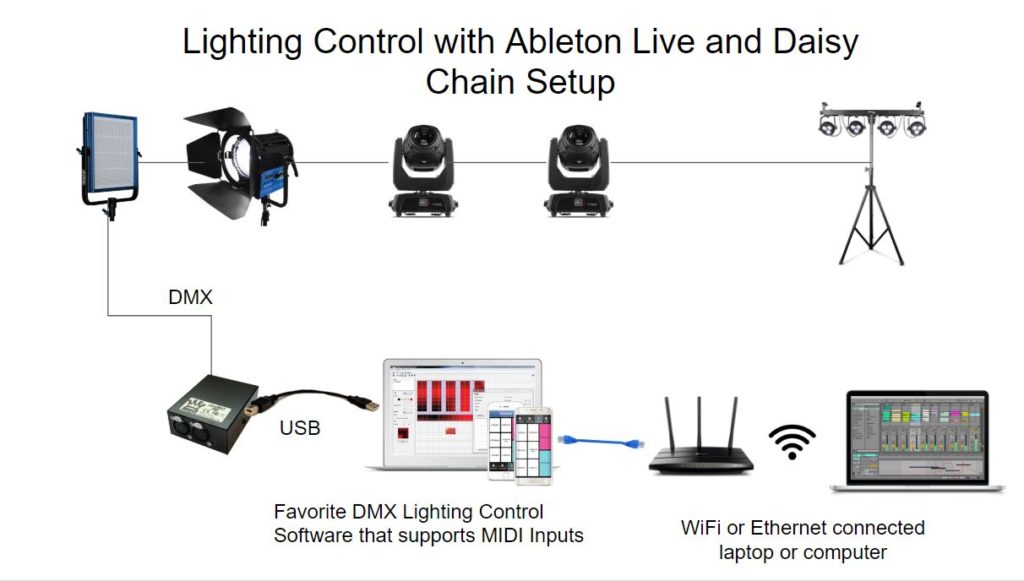
Including lighting control in Ableton Live
One of the most advanced parts of this system beside the PTZ camera controls and Blackmagic video switchers is the Chauvet DJ lighting control. The Chauvet DJ lights are controlled over DMX which is a lighting control protocol. Keys Vineyard church has used multiple lighting control solutions with their Chauvet DJ lights and ultimately decided to use Vista Software by Choma-Q to control the lights and automate everything with Ableton. There are now multiple plugins for Ableton which allow easy lighting control triggered directly through the Ableton Live software timeline. This further simplifies the church video production setup because as TouchOSC starts a song it can now handle all the programmed lighting.
ProPresentor and Church Lyrics Chomra Keying
Finally, we can forget about the amazing lyrics that are being displayed on the projector screens throughout the church service. ProPresenter is a great tool for controlling projectors and even chroma keying on top of the video being sent out of the Blackmagic video switcher. So as ProPresenter is triggered in sync with Ableton Live the lyrics are displayed over the live PTZOptics video cameras that are displayed on the projectors.
The post Advanced Feature for Churches that Rock! appeared first on PTZOptics.
]]>Continue reading "How Telehealth is Changing the Landscape of Healthcare"
The post How Telehealth is Changing the Landscape of Healthcare appeared first on PTZOptics.
]]>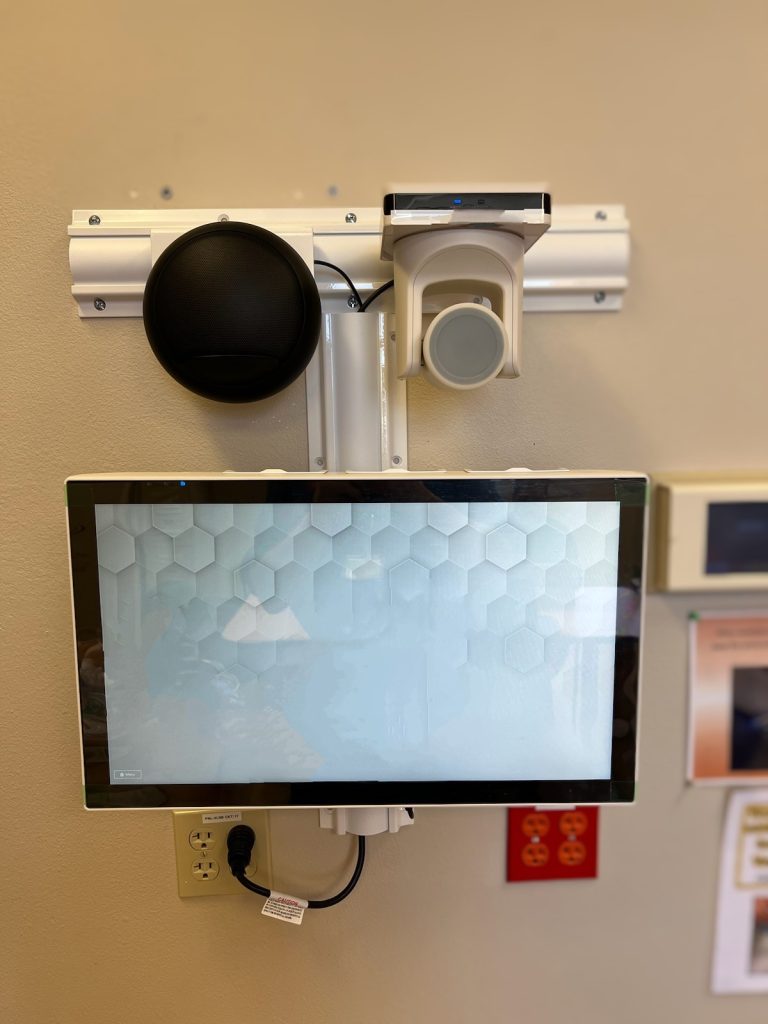
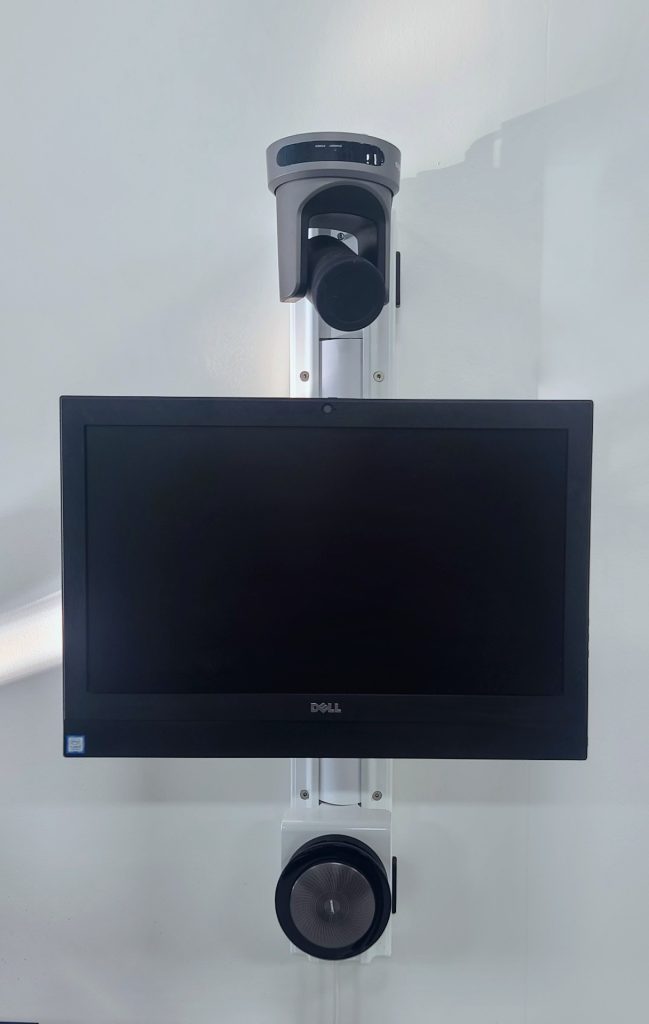
Interhospital communication, encompassing doctor-to-patient and inter-departmental correspondence, forms an essential backbone for telehealth operations. This crucial sector of healthcare is now being significantly enhanced by PTZOptics’ state-of-the-art pan, tilt, zoom (PTZ) cameras, as well as Strongarm Healthcare’s custom-designed mounting solutions. These advancements facilitate everything from comprehensive examinations to urgent conferencing calls, bolstering the accuracy of diagnoses and optimizing patient care, irrespective of geographical constraints.
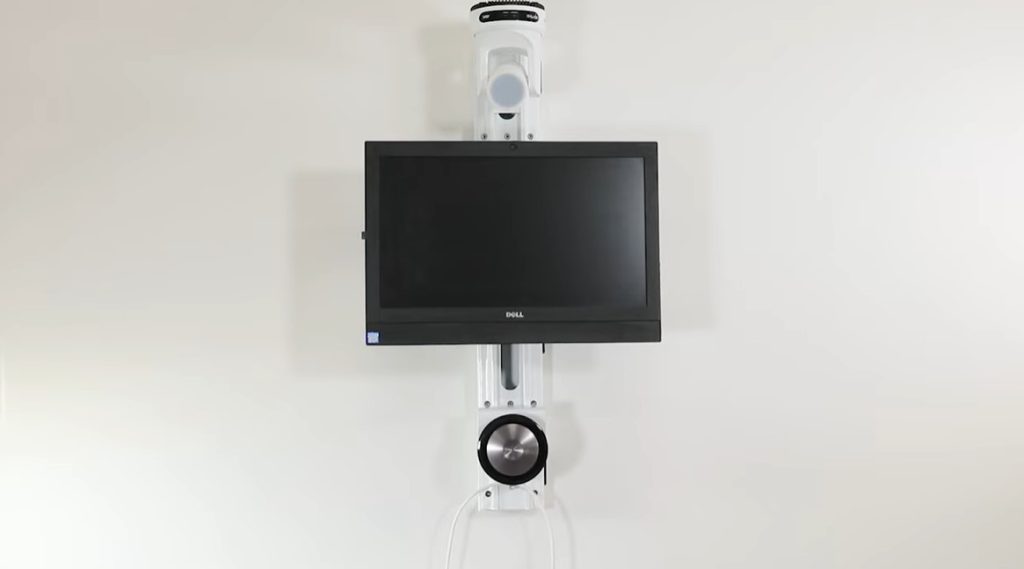
A growing number of healthcare practitioners are leveraging PTZOptics PTZ cameras and StrongArm’s Mounting solutions to improve telehealth consultations. They trust the stability and reliability of these systems, ensuring that the vital technology employed during such interactions remains securely anchored and operational
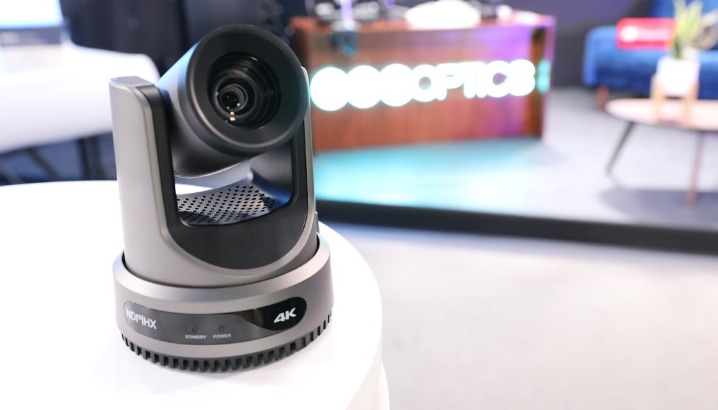
The latest innovation from PTZOptics is the Move 4K PTZ camera model, setting a fresh industry standard. It offers varying levels of optical zoom—12, 20, and 30 times—to cater to diverse professional requirements.
Recognizing that each medical setting is unique, PTZOptics does not propose a one-size-fits-all solution. Instead, they offer a versatile product line equipped with NDI, SDI, HDMI, and USB signal outputs. Additionally, their cameras have varying control options depending on the model, further enabling customization to specific needs.
A key product offering from PTZOptics is the newly introduced Studio Pro. This camera is specifically designed for consultative telehealth engagements, particularly for patients residing in more remote locations. It promises a crystal clear, stable image, affirming its status as an ideal choice for telemedicine.
The post How Telehealth is Changing the Landscape of Healthcare appeared first on PTZOptics.
]]>Continue reading "New PTZOptics SuperJoy Features"
The post New PTZOptics SuperJoy Features appeared first on PTZOptics.
]]>
The post New PTZOptics SuperJoy Features appeared first on PTZOptics.
]]>Continue reading "Live Streaming Sports with PTZ Cameras"
The post Live Streaming Sports with PTZ Cameras appeared first on PTZOptics.
]]>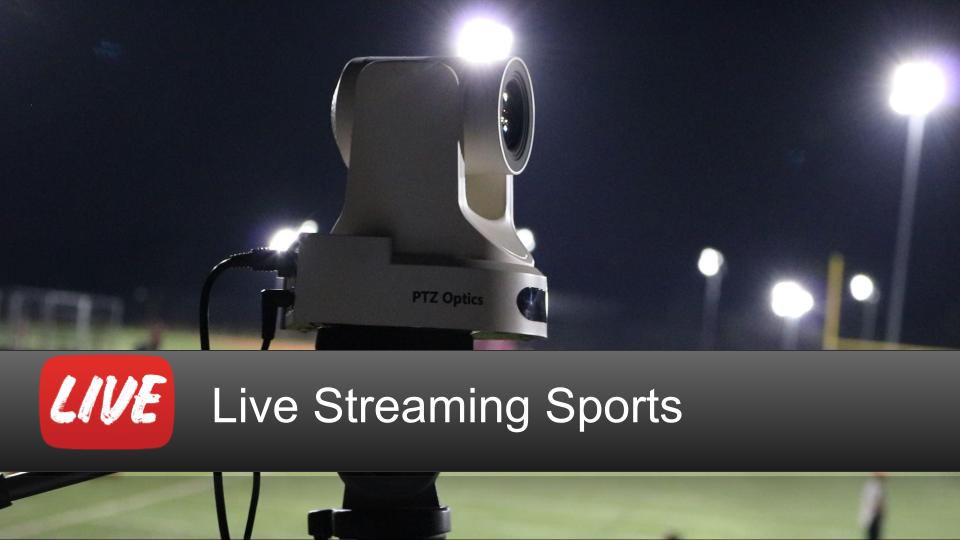
The post Live Streaming Sports with PTZ Cameras appeared first on PTZOptics.
]]>Continue reading "Our new studio is done and you can book a meeting to check it out"
The post Our new studio is done and you can book a meeting to check it out appeared first on PTZOptics.
]]>
See the new Auto-Tracking Cameras
The new Move 4K PTZOptics cameras now feature auto-tracking, making it easier than ever to integrate automatic subject tracking into your live streaming or video production setup. This innovative technology allows you to keep the camera focused on your subject, no matter how much they move around. Add a creative and dynamic touch to your videos by taking advantage of this powerful feature – and let PTZOptics help you bring your production dreams to life!
Check out the latest software integrations
With PTZOptics cameras, you can now use your favorite live streaming software such as OBS, Wirecast, vMix or Livestream Studio to take advantage of their built-in pan, tilt and zoom camera controls and preset settings. With this capability, you’ll be able to stream like a professional – with automated camera movements and simple pre-configured settings all done from within the software. Take your live streaming capabilities to the next level today with PTZOptics!
Request PTZ Joystick Control Demonstration
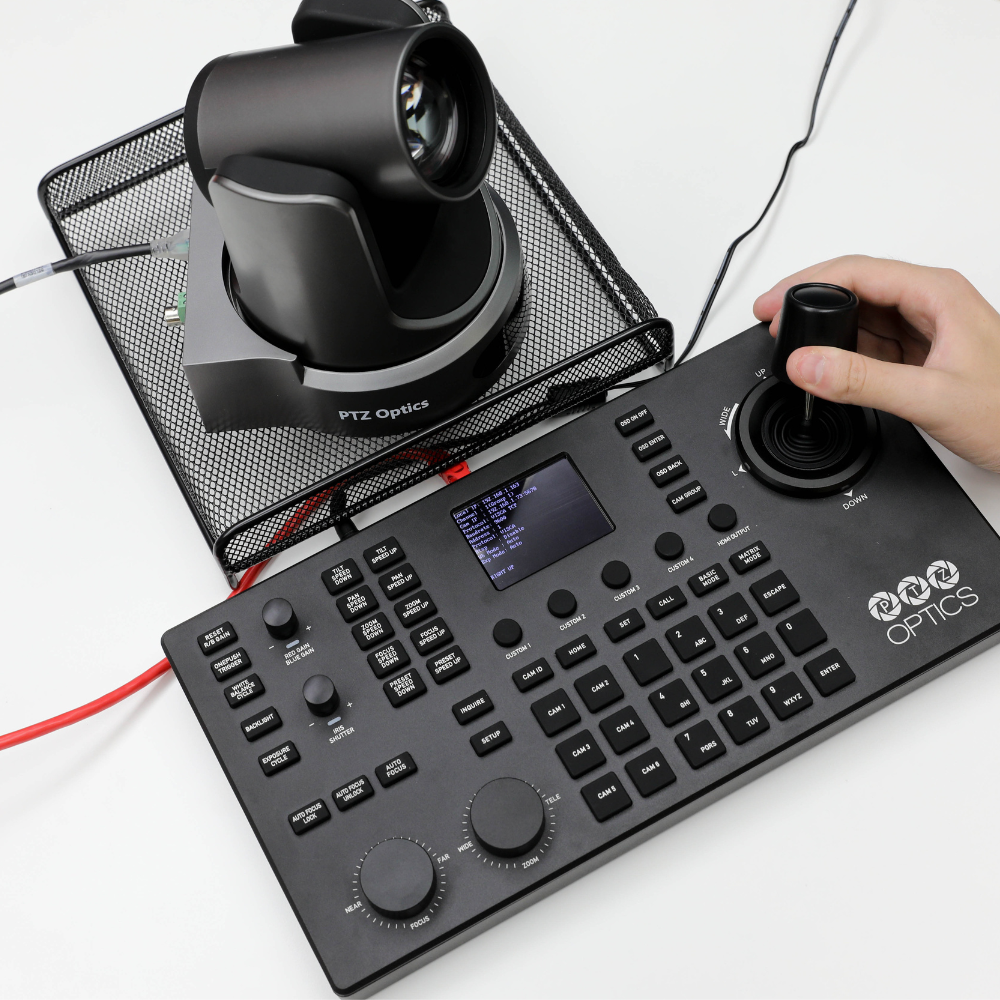
With PTZOptics joysticks, you can control the movement of your camera with precision and finesse. These joysticks allow the camera to move slowly and smoothly through a variety of settings for live production, lecture capture, sports coverage and more. Request to see one of these in action for yourself and experience the cutting-edge technology that ensures your production projects are successful every time.
Book a Meeting Today!
PTZOptics would like to invite you to book a live camera demo from our studio, where you can check out the latest 4K pan, tilt, and zoom cameras that we have to offer. Our team of experts can show you how our cameras perform in real-time, helping you decide if it’s the right choice for your project. We’re here to help make sure you get the best quality equipment for your needs – so don’t hesitate and book a demo today!
The post Our new studio is done and you can book a meeting to check it out appeared first on PTZOptics.
]]>Continue reading "Best camera at CES goes to Studio Pro"
The post Best camera at CES goes to Studio Pro appeared first on PTZOptics.
]]>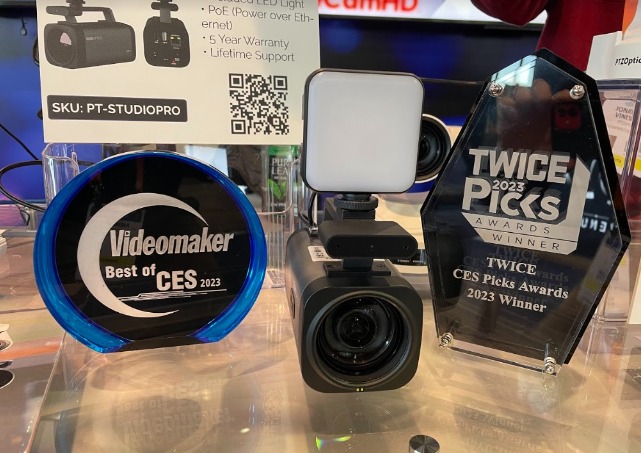
Perhaps the first feature of the Studio Pro that many video professionals are drawn to is the included LED panel light. Most video users know that proper lighting on a video call or live stream is important to ensure high-quality video capture. The Studio Pro solves this issue by including an LED panel light that is powered by the camera which simplifies desk setups and cabling for busy professionals. The Studio Pro can easily be powered by USB or an ethernet connection with power over ethernet (PoE). So once the camera is ON, it can also power an LED light or other devices via a USB 2.0 connection designed for the LED panel light.
From a connectivity perspective, many video users are excited about a plug-and-play USB-C camera that is now available with such as high-quality integrated 12X optical zoom lens. The PTZOptics Studio Pro uses the same high-quality optics in the Studio Pro that they are known for in their 12X PTZ camera range. One notable difference is the addition of Time of Flight (TOF) focus capabilities which allow the Studio Pro to focus faster than previous ZCam models.
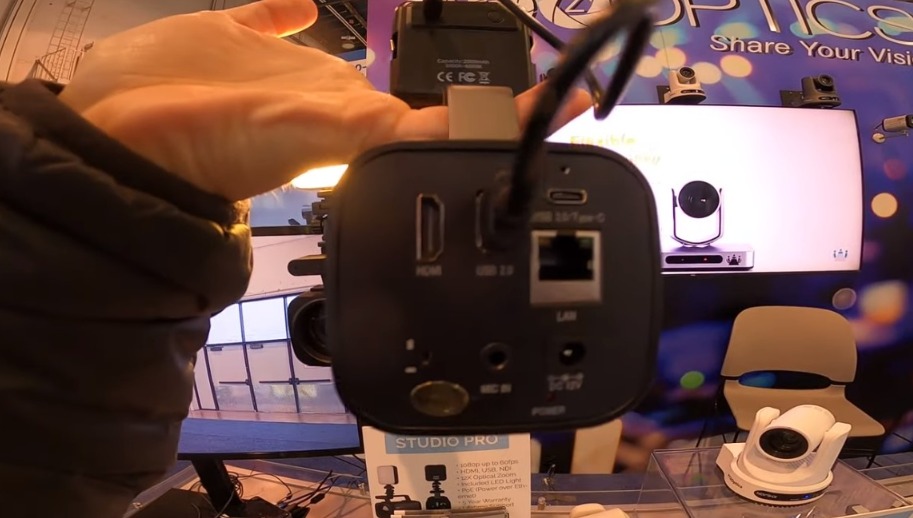
Beyond USB, the Studio Pro is ideal for multi-camera productions using HDMI video switchers such as Blackmagic ATEM Mini and Roland video switchers. Many professional video users prefer HDMI connectivity that can be switched via a hardware switcher and then converted into USB which reduces the processing burden on computers used to produce live video. The Studio Pro is ideal for HDMI video switchers with resolutions up to 1080p at 60 frames per second.
Beyond HDMI and USB, the Studio Pro also offers Network Device Interface (NDI) support. NDI is an IP connection option that allows video professionals the ability to send video over a standard network. The Studio Pro supports PoE and therefore can be connected to a network with a single ethernet cable used to power the camera, send video, and control the camera as well.
The Studio Pro also supports 3.5mm audio inputs which is ideal because it can embed that audio directly into HDMI, NDI, or USB connections. This is great for adding a shotgun microphone to the side of the camera such as a Rode microphone. Devices such as Rode microphones and tally lights can be connected to the side of the camera with additional quarter-twenty connections that have been made available.
In conclusion, it’s no surprise the Studio Pro won multiple awards at the 2023 CES Show. You can request a demo of the Studio Pro by contacting partners@ptzoptics.com.
The post Best camera at CES goes to Studio Pro appeared first on PTZOptics.
]]>Continue reading "How to use the PTZOptics iOS app to control your PTZ camera"
The post How to use the PTZOptics iOS app to control your PTZ camera appeared first on PTZOptics.
]]>The post How to use the PTZOptics iOS app to control your PTZ camera appeared first on PTZOptics.
]]>Continue reading "Android PTZ Camera Controls with Live Video Preview"
The post Android PTZ Camera Controls with Live Video Preview appeared first on PTZOptics.
]]>We often see requests for the ability to add a live preview to the mobile control applications that are available for the PTZOptics cameras and until recently there was no solution we could offer. Using the Android 7.0, or greater, platform there is a multi-window feature that was added, sometimes referred to as “split-screen,” where you can view two active applications at the same time. With this feature, we can now have a live preview of a PTZOptics camera with P/T/Z control on the same screen at the same time using the proper applications.
Required Applications
- PanTiltZoom – on Google Play Store for P/T/Z control
-
VLC – on Google Play Store for Live Preview using RTSP

That PanTiltZoom application has the ability to control up 8 PTZOptics cameras. You will need to enter each camera’s static IP address in order to connect them to your smartphone. Also, you smartphone will need to be on the same WiFi network as the IP connected cameras. Once your smartphone and PTZOptics cameras are connected to the same network you can control the Pan Tilt and Zoom functionality of these cameras with some advanced features that are demonstrated in this video. In the settings area, you will see that you can adjust unique PTZ camera control for both manual and preset speeds. Therefore you can control the camera with manual speeds and different speeds for movements between PTZ presets.
Once you have installed both applications on your Android device you’ll need to open both applications and setup as follows:
PanTiltZoom Setup
-
Open the PanTiltZoom application
-
Click the “Setup” gear in the top right corner to setup your camera
-
Name – use any title that works for you
-
IP Address – Current IP address of the PTZOptics camera to control
-
VISCA Port – 5678 (default)
-
VISCA Address – 1 (default)
-
-
Exit this screen, using the back button and the close button that follows, and you should now see your name shown on the first camera selection button
-
Click that button with the new Name in place and the button should turn green.
-
You can verify you have control of the camera at this time by moving the joystick around
-
-
Your PanTiltZoom Application is now ready to be “split-screened” with VLC… we just have to get VLC setup

VLC Setup
Just like the PanTiltZoom application, your smartphone must be on the same network as the PTZOptics cameras. Once connected to the same network you can bring live video preview into your smartphone from your cameras. If you are interested in tweaking the RTSP streaming settings to reduce latency, the PTZOptics team has this guide that you can reference. This guide references best practices for optimizing your RTSP streaming settings to achieve the highest quality and lowest latency for your video preview.
-
Open the VLC application
-
Click the three (3) bars in the top left of the application
-
Click “Stream”
-
For “Enter network address: e.g…” you’ll need to supply the string used to access the RTSP feed of your PTZOptics camera
-
HD RTSP Stream – rtsp://<camera ip>:554/1
-
SD RTSP Stream – rtsp://<camera ip>:554/2
-
Example
-
Camera IP = 192.168.100.88
-
RTSP = rtsp://192.168.100.88:554/1
-
-
Click the “Paper Airplane” icon to start streaming a live preview Note: please be aware there may be latency experienced in viewing the stream via VLC
-
-
-
VLC is now setup to be “split-screened” with the PanTiltZoom application
Split-Screen Setup
Android phones offer a split-screen setting that is used for this project. You will be able to select VLC as your main split-screen source and add the PanTiltZoom app so that you can use both applications at the same time.

Note: I did not need to enable “split-screen” or multi-window mode on my Android device however with different versions you may need to enable the feature before you can proceed.
-
Exit to the main Android screen using the “HOME” button
-
Now use Android to show you all active applications… for me this is done by swiping up from the “HOME” button but differs depending on the manufacturer please see the example screenshot below

-
You’ll notice each application has a small “bubble,” or circle, with its own icon at the top
-
Push and hold the “bubble” icon above VLC until a new menu appears
-
Select “Split-Screen” and the application will lock itself to the top of your screen
-
Now without exiting the application selection screen, as shown above, simply click on the PanTiltZoom application to make it the second application used with “split-screen” mode.
-
-
You can drag the bar in between the two (2) applications to adjust the size of each application until you find a comfortable fit
-
Please see screen-shot example of the finished solution below
-

The post Android PTZ Camera Controls with Live Video Preview appeared first on PTZOptics.
]]>Continue reading "Live Streaming for Elected Officials"
The post Live Streaming for Elected Officials appeared first on PTZOptics.
]]>
Traditional broadcast outlets, including television and radio, usually demand high advertising rates to reach intended audiences. Live streaming offers a sought-after alternative that’s both cost-effective and engaging for online audiences on channels such as Facebook and YouTube. To get started with a live stream, a professional-level studio is essential. We recommend setting up a small studio with several LED lighting sources and cameras to capture your host and interviewee in a flattering light. Set up two chairs for both your host and interviewee to create a relaxed, engaging feel for your live stream. For the cameras, the PTZOptics Producer Kits are the perfect option to live stream and record professional, high-quality video.The kits allow for live streaming and recording with up to two cameras. PTZOptics cameras provide high-quality pan-tilt-zoom shots, which are easily controlled through the kit’s accompanying joysticks. We used both front and side-angle shots to capture both speakers while making the live stream interesting for our audiences.

In addition to the studio portion, our interview included an IRL(In Real Life) component, where our interviewer and state senator took the stream outside to the streets of West Chester, Pa. This offered another way for the state senator to engage viewers in the live stream and also garner participation from those in the community. Our producer carried a LiveU backpack for the mobile stream. LiveU offers portable cellular backpack solutions for high-quality, reliable video streaming that make incorporating an IRL stream easy.

Accompanying the LiveU, we used a PTZOptics 12xZcam broadcast camera on a tripod. The Zcam’s lens allows for extremely wide shots, which was perfect for capturing our host, the State Senator and the views from the streets as the pair interviewed people along the streets. The 12x optical zoom gave us the ability to capture close shots, too, even when our camera was at a farther distance.
Our experience illustrated what a valuable tool a live stream can be for engaging audiences and promoting civic engagement. With election cycles being a frequent event for municipalities, school boards, and other community groups, live streaming candidate interviews will be a logical choice to attract voters.
Live streams provide immediate audience feedback and engagement while being cost-effective methods of reaching voters and constituents.
The post Live Streaming for Elected Officials appeared first on PTZOptics.
]]>Continue reading "Outdoor PTZ camera setup guide"
The post Outdoor PTZ camera setup guide appeared first on PTZOptics.
]]>
NOTE: PTZOptics is not responsible for the improper mounting of this enclosure. We highly recommend working with an insured professional audiovisual integrator to properly mount this enclosure.
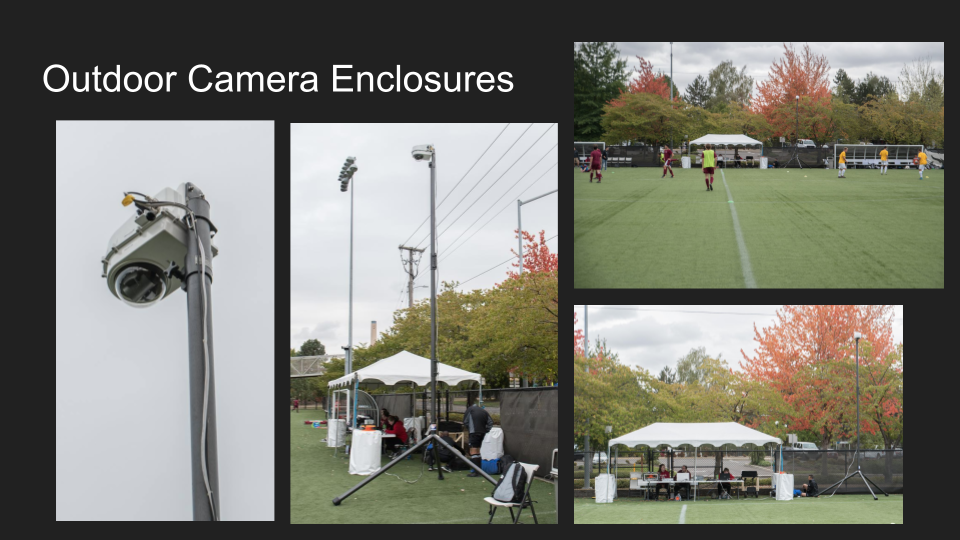
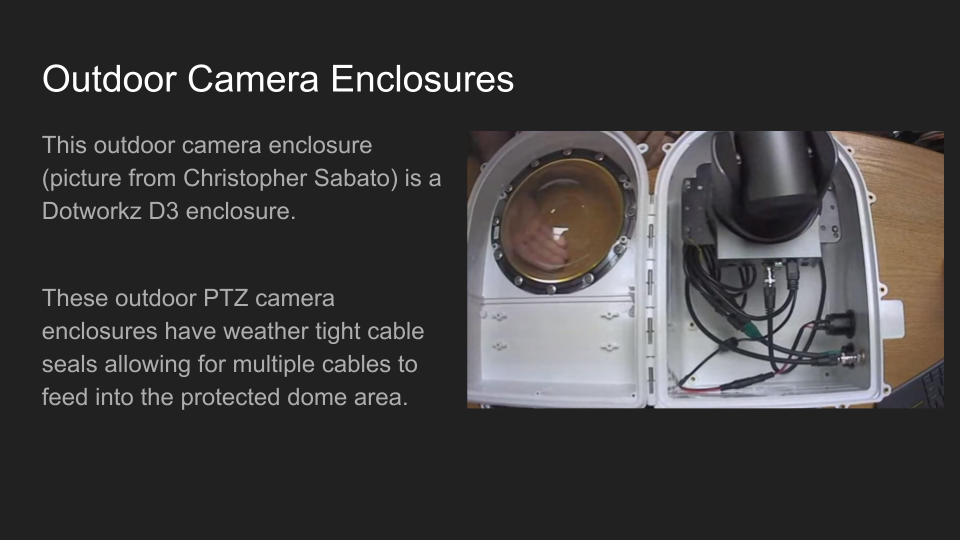
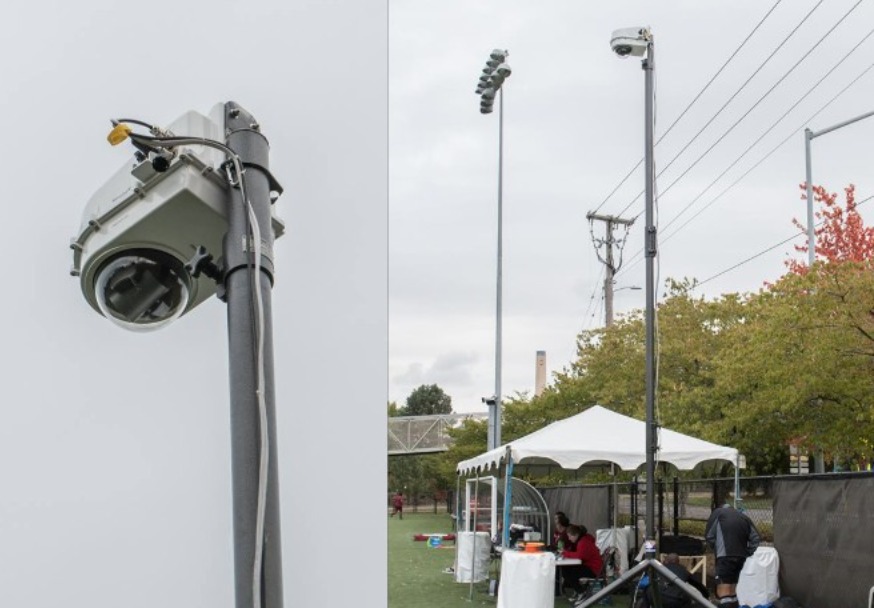
For outdoor PTZ camera installations, we highly recommend the PTZO-HB. The HB in the enclosure part number stands for Heater Blower and this device will help prevent fog and condensation that can build up on the enclosure lens. When you are planning to mount the enclosure to an outdoor surface it’s important to mount the enclosure 100% vertical so that when the cameras panning left or panning right, you end up with a level horizon. Mounting the camera enclosure on a vertical surface makes sure there are no discrepancies between left and right camera panning operations. With a project like this, it’s always best to start with a site survey. If you are working with a professional audiovisual integrator, take plenty of pictures to share with them exactly where you would like to enclosure mounted.
NOTE: The PTZO-HB enclosure does require power for operation. You should consult a licensed electrician to connect power to this enclosure.
Once your site survey is complete, you can review the included hardware with the enclosure. Professional installation teams will start by drilling any holes required for cable pathways to your video production hardware. This could include holes for passing through SDI, Ethernet, or RS-485 cabling to your press box or video production room. Remember that all cabling will need to be un-terminated before passing through the weather-tight holes on the side of each enclosure. Once the cables have made their way through to the inside of your enclosure, you can terminate the ends for a proper connection.

Next, you can connect your enclosure to the surface with the included hardware. For hard surfaces, we suggest using anchors with the included toggle-bolts. Once your enclosure has been securely mounted your vertical surface you can run your cables through the weather-tight conduit feeds. You will notice on the side of each unit that there is a weather-tight cable pathway you can use to extend Ethernet, SDI, and other cables through to connect to your camera. Once you have decided which cables you want to bring into your enclosure and you can start by pulling the wires through this weathertight port. Once the raw cables are inside your enclosure you can terminate the cables and add the connection ends. To assure an airtight seal, consider using caulk around the wires and cables, coating the entire plug surface with sealant.

Next, you can mount your PTZOptics camera to the black camera bracket using the center hole with the included quarter-twenty screw and a single washer. Next, you can mount your camera with the attached brackets inside the enclosure with the set screws you have laid out. Once your camera is firmly mounted inside the enclosure you can connect the cables you have into your camera. Before closing the enclosure make sure everything is working properly. Once you have confirmed all cabling is working you can close your enclosure using the Philips head screwdriver or electric drill you used to open the unit.

Note: It is possible to attach this camera enclosure to a large Tripod or speaker stand. This is ideal for outdoor streaming scenarios where you want to protect your camera for the elements. The Dotworkz enclosures are available with adapters that can be used with TriPods, Speaker Stands and truss pipes. Please refer to the enclosure manual for more information on how to you can use outdoor tripod stands with this enclosure.
WARNING: Carefully read through the entire Dotwokz manual to ensure that you have been taking all steps of the installation process into account. This video is only intended to guide experts who have already read through the included manual.
The post Outdoor PTZ camera setup guide appeared first on PTZOptics.
]]>